Setting up SSO with Okta
This guide walks you through the setup process for enabling Single Sign-On (SSO) for your instance with Okta. Once the SSO is configured for your instance, users will be redirected to your configured Okta identity provider domain to complete the login.
We support SSO login to cptn.io instance using OAuth/OpenID Connect (OIDC).
Setup Instructions
In cptn.io instance
- Login to your cptn.io instance.
- Navigate to Settings page from left nav.
- Click Single Sign-On tab on the page.
- A SSO Configuration page will be displayed.
- Copy the Redirect URI shown for your instance. This URL will be used for defining configuration in your identity provider.
In Okta
- Login to Okta admin portal via https://developer.okta.com
- Click Applications in the left nav.
- Click Create App Integration button.
- Select Sign-in method as OIDC - OpenID Connect.
- Select Application Type as Web Application.
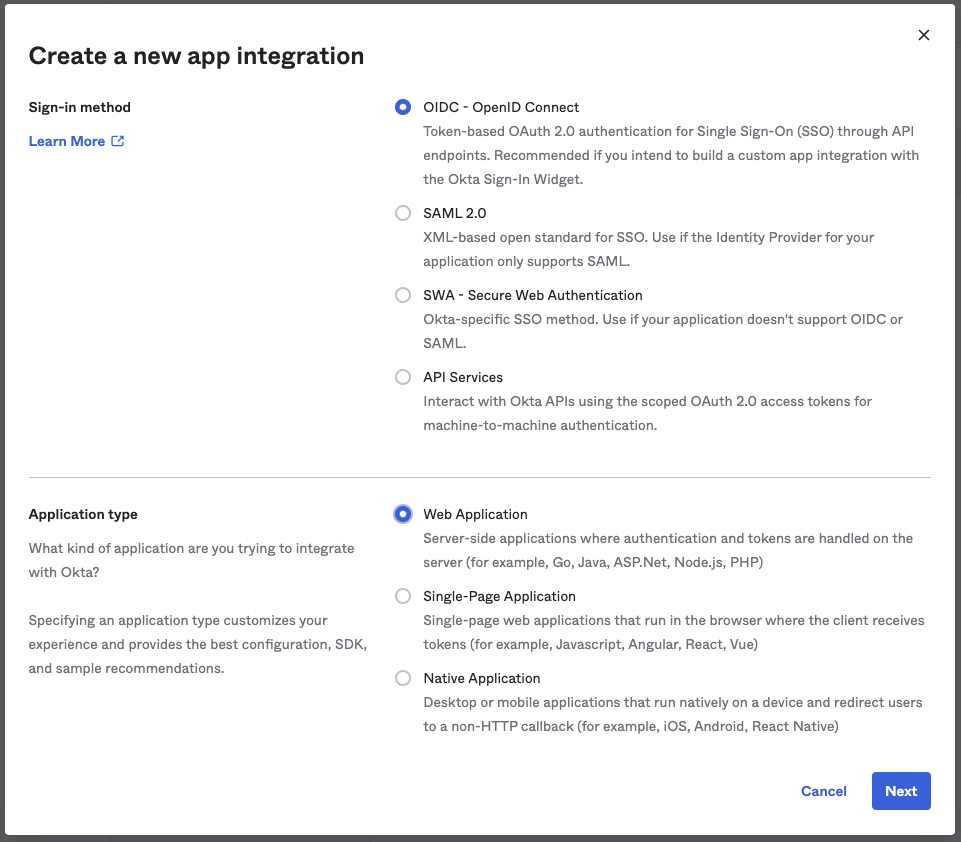
- Click Next
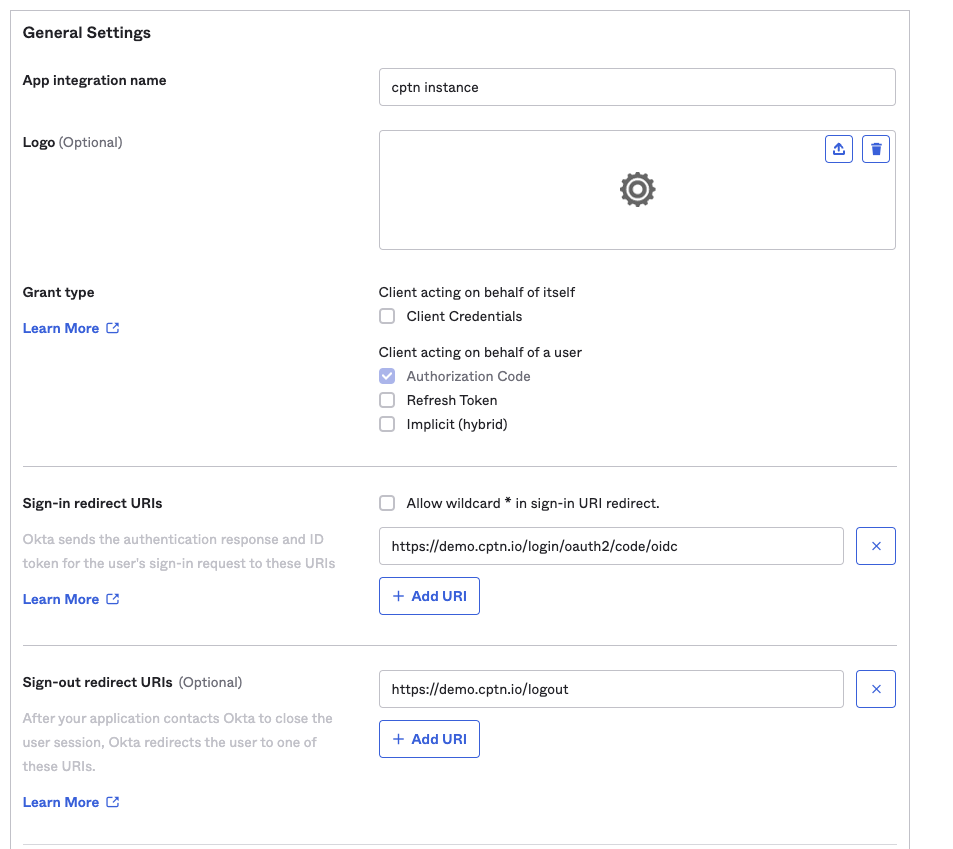
- Provide a name for the App integration. (e.g. cptn instance)
- Provide the previously copied Redirect URI to Sign-in redirect URIs field.
- Provide the Sign-out redirect URIs as
https://${your-cptn-instance-url}/logout - Select appropriate option for Assignments based on who should be granted access to your cptn instance.
- Click Save
- Copy the generated Client ID and Client Secret from the page.
- Navigate to Assignments to assign users/groups to this configuration.
(Optional)
To allow login to be initiated from Okta, under LOGIN section:
- Change Login initiated by to Either Okta to App
- Set Initiate login URI as
https://${your-cptn-instance-url}/login?sso=true
Back in cptn.io instance
- Login to your cptn.io instance.
- Navigate to Settings page from left nav.
- Click Single Sign-On tab on the page.
- A SSO Configuration page will be displayed.
- Provide the Client ID copied from Okta portal
- Provide the Client Secret copied from Okta portal.
- Provide OIDC Configuration Well-Known URL for your Okta domain. The Well-Known URL for Okta is in the format:
https://${yourOktaDomain}/.well-known/openid-configuration. For example: https://foo-bar.okta.com/.well-known/openid-configuration
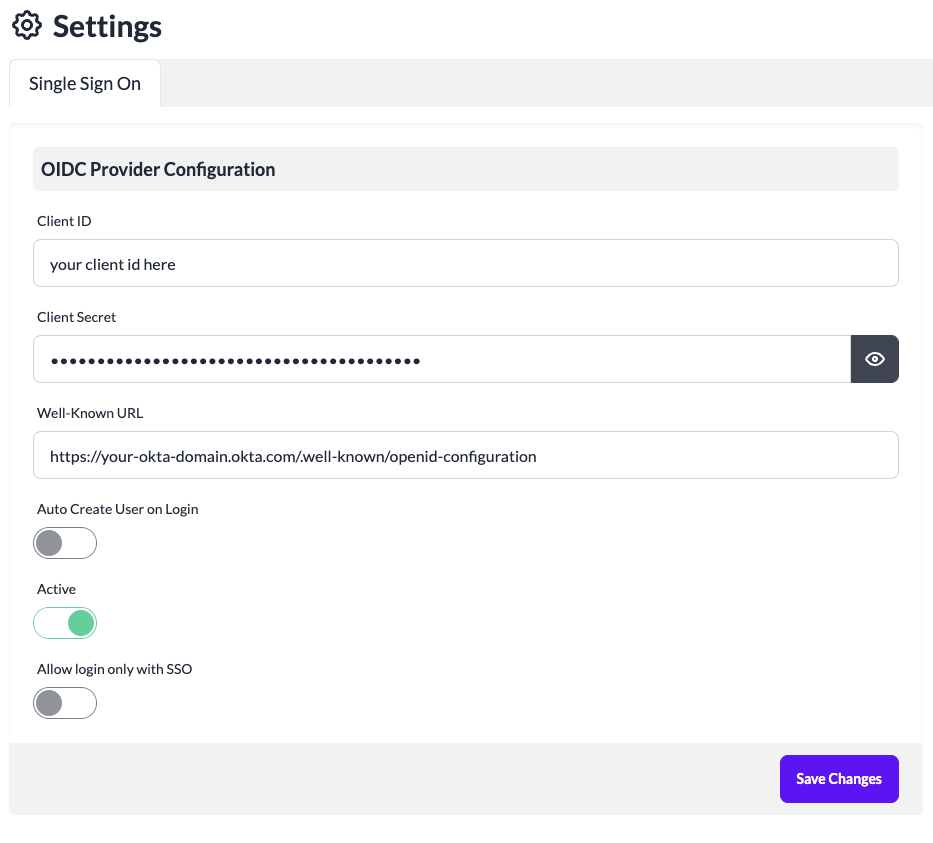 8. Toggle Active to ON.
9. Leave Allow login only with SSO to OFF for now until the SSO configuration is tested.
10. To support creating users on your cptn.io instance on first login via SSO, set Auto Create User on Login to ON.
11. Click Save Changes
8. Toggle Active to ON.
9. Leave Allow login only with SSO to OFF for now until the SSO configuration is tested.
10. To support creating users on your cptn.io instance on first login via SSO, set Auto Create User on Login to ON.
11. Click Save Changes
The SSO configuration is now complete. You can now logout and try logging using your SSO credentails.
Once you confirm that the SSO based login is successful, remember to update the SSO configuration to set Allow login only with SSO to ON to disable Password-based login to your instance.